Blog
How to Register for the ACT
- November 3, 2017
- Posted by: michael@mjprep.com
- Category: ACT Prep
Need to register for the ACT? We’re here to help! You can register for the ACT by mail or online, and we’ll focus exclusively on the online option. Registering for the ACT online is much faster, plus you’ll be able to see live test center availability – it’d be a bummer to register by mail and find out that your preferred test site doesn’t have any seats. Lastly, after you register for the ACT online, you can print your test ticket and immediately put it on the fridge where it belongs.
Step 1: Look at Available ACT Test Dates
Check out our list of ACT Test Dates to see what’s upcoming!
Step 2: Go to the ACT Registration Website
Head to the ACT student website, http://www.actstudent.org, which will redirect you to http://www.act.org/content/act/en/products-and-services/the-act.html. There are no other sites that allow you to register for the ACT, so make sure you’re on the official one!
Step 3: Sign In or Create an ACT Student Account
An ACT account will allow you to view your scores online, access your test tickets, make any changes to test registrations, and send scores to colleges.
If you’re on a desktop computer, click the “Sign In” button at the top right of the page.
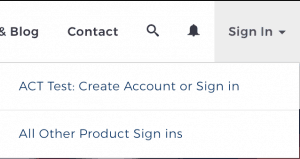
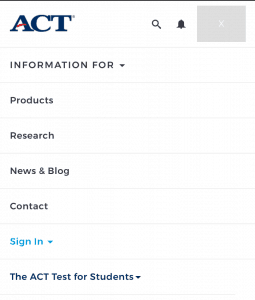
If you’re on mobile, click the “Menu” button at the top right of the page, then “Sign In” on the dropdown menu.
Click “ACT Test: Create Account or Sign in.”
If you’re brand new, click the “Create Account” button on the left side of the page.
Do: Use your full, official first and last names. Why? The ACT test proctor will need to match your test ticket with the ID you’ll bring to the test center. If the names don’t match up, you won’t be able to test! Secondly, you’ll eventually send your ACT scores to colleges, and they’ll need to match up your scores with your application. Don’t use a nickname on either, since it can cause problems later!
Don’t: Use your school email address, since you won’t have access to it after you graduate, OR your parent’s email address.
If you’re returning, enter your User ID and Password on the right side of the page and click “Log In.”
Step 3: Register for the ACT
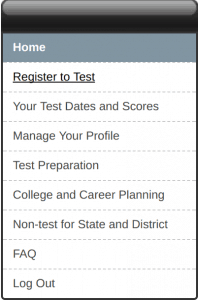
Once you’ve created an account or logged in, click “Register to Test” from the menu on the left.
Here’s where the fun starts.
Page 1 – Accommodations
If you have a disability that grants you test accommodations, choose “Yes” on the first screen. You’ll then choose whether you’re requesting accommodations for a National test date (testing in the US on one Saturday) or for Special Testing (more than 50% time extension, testing over multiple days, alternative test formats, or testing outside the US).
You’ll receive an email from ACT within two days giving you next steps for accommodations. You’ll need to share that email with your school counselor (or other approved school official) who’ll confirm your accommodations at school. If you don’t have accommodations for a disability at school as part of an IEP or 504 plan, you won’t be approved for ACT testing accommodations.
Page 2 – Personal Information
- Enter YOUR email address at the top of the page.
- The only two options for gender are Female and Male.
- If you “are of Hispanic or Latino background,” respond accordingly.
- Note that the race question is not required – you can choose “Prefer not to respond or none of these apply.”
- If you click “Yes” in the first yellow box, be prepared to receive lots of email and snail mail.
Pages 3 through 8 – High School Summary, College Plans, College Interests, Special Interests, Extracurricular Activities, Paying for College
This is a long, optional information section. ACT says that “It is designed to help you think about your educational future and to help colleges in their planning.” What does that mean? Your guess is as good as mine.
Again, note that this entire section is optional. You can click “Continue” at the bottom of each page to skip entering the optional information.
Page 4 – Background Information
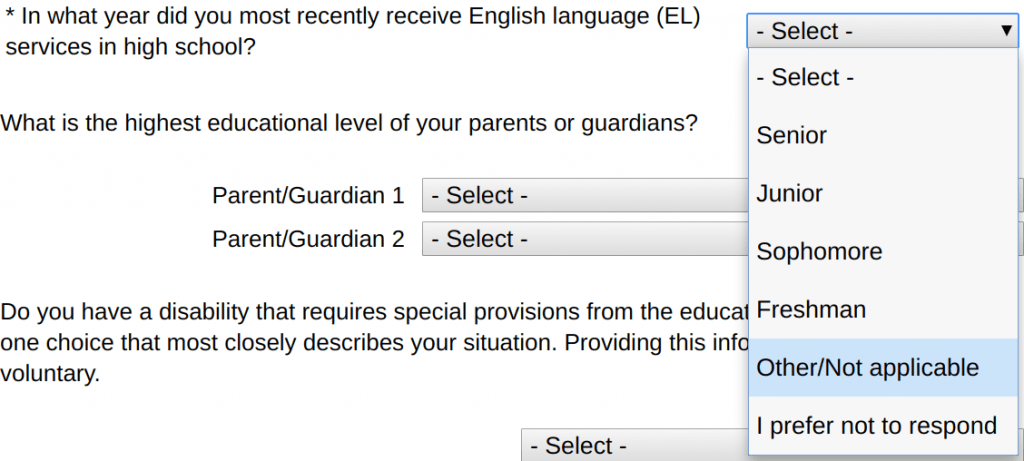
We’re back to some required questions. You can enter your “best language,” “first language,” and whether or not you receive English language services at school OR you can select “I prefer not to respond” (though I don’t see any reason not to). If you haven’t received English language services in high school, select “Other/Not Applicable” for the last required question.
Pages 5 and 6 – Accomplishments and Interest Inventory
Back to optional information. Just like Pages 3 – 8, you can either fill out everything or leave the sections blank. ACT states that the Interest Inventory will help you, “Consider college major possibilities, strengthen college major plans you already have, consider career possibilities,” and “plan high school or college coursework.”
The interest inventory section asks you to rate different activities as “Dislike,” “Indifferent,” or “Like.” Yes, you can select “Dislike” for “Help rescue someone in danger,” but that would make you a bad person.
Page 7 – Select Where to Test
Self-explanatory
Page 8 – Who’s Registering the Student
In most cases, you’ll only select the first box – “I am registering myself.”
Page 9 – Registration Information
The top of the page has links to informational documents for students who can’t test on Saturdays, students who are homebound or confined, and students who receive accommodations in school due to a disability.
Read the Terms and Conditions. Highlights are:
- ACT will share your personally identifiable information when sending scores to colleges. They need to know whose scores they’re receiving. They’ll also send your scores and photo to your high school.
- You’ll need to submit a photo that meets ACT photo requirements (more on this later).
- ACT might take pictures or videos of you at test centers – for security, not brochures.
- There are lots of ways to get your registration cancelled (I count 31).
- ACT is picky about what you bring into the test center.
- If they think your scores are fishy, they may review your scores. If they’re still convinced your scores are fishy, they might invalidate your test.
- ACT can limit the number of times you retest. As of right now, that limit is 12. If you need to test 12 times, you might want to consider ACT prep.
- You aren’t allowed to share test questions.
Once you’ve read the whole Terms and Conditions, click the box certifying that you are you and you understand the Terms and Conditions.
Page 10 – Test Date and Option
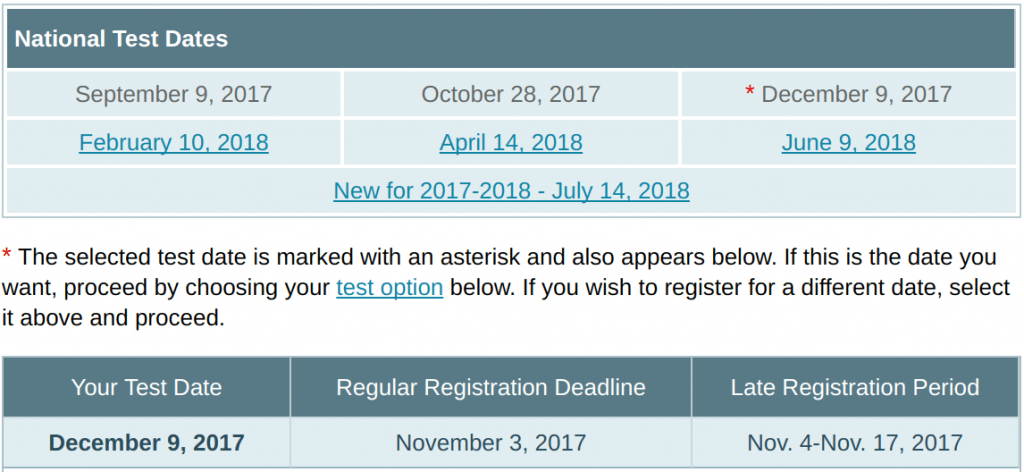
Important: This page defaults to the next available test date. Look closely to make sure you’re signing up for the date you intend to test! If you intend to test on a later date, click the corresponding link from the top table.
Choose whether you’re going to test without writing ($46) or with writing ($62.50). In either case, if you’re in the late registration period, you’ll pay an extra $29.50 late fee.
You can choose online test prep, though we recommend one-on-one ACT prep, which has proven to be much more effective.
“Test Information Release” (TIR) is available for the December, April, and June ACT dates. If you purchase the TIR for $20, you’ll receive a fresh, unmarked copy of the ACT test you took as well as a sheet with your answers and test key.
You can purchase an Official ACT Prep Guide here for $40.20 or you can purchase it on Amazon [link] for under $30.
Page 11 – Your High School
You likely don’t know your “high school code” off the top of your head, so search for your high school in the second yellow box.
After you’ve found and selected your high school, select your current grade level.
Page 12 – High School Courses (Required)
You’ll need to list which classes you’ve taken, are taking, are going to take, or aren’t going to take. A response is required for every single line, so if you can’t Continue from this page, check to see if you missed a line.
Page 13 – Grades (Not Required)
You can use your transcript to fill out this page, though it’s not required. If you do choose to fill out the page, ACT will calculate a GPA for you and report it with your test scores to colleges.
Page 14 – Your Score Reports and College Choices
Take a second to verify that the test date at the top of the page is correct. You don’t want to go through this whole process and find out you accidentally signed up for the wrong date!
You now have the opportunity to choose up to six colleges that will receive your scores. You can send up to four for free. In many cases, it makes perfect sense to automatically send your scores to schools.
Don’t worry about bombing the test and having colleges deny you for one low ACT score! If you have an emergency during the test and are unable to finish, you can notify ACT and they won’t even score your test. Secondly, if you walk out and feel like you did completely bomb, you still have five days to return to this ACT registration and remove schools from the auto-send list.
Note that if you don’t select schools to automatically receive your scores, you’ll have to pay $12 per score report, per school. Let’s say you’re applying to Amherst, Baylor, and Florida State, which all superscore. Let’s also say that you had three very different test results, and your superscore comes from all three of those test dates. You’ll pay a total of $108 just to send your scores to those three schools (3 test dates x 3 colleges x $12 = $108).
Remember: you get four for free, and you can always remove them within five days of your test if you don’t feel good about sending.
Pages 15 and 16 – Your Future Plans
You can choose a major and occupation, or else you can choose Undecided and Undecided. Whether you choose actual options or Undecided, you’ll be asked to rate your confidence in that choice. Yes, you can be very sure that you’re unsure.
Pages 17 and 18 – ACT Test Center
You’re getting close to the finish line! Just like you likely didn’t know your high school code on page 11, you likely don’t know the test center code for where you want to test. Instead, enter your zip code in the second yellow box to find the test centers closest to you.
You’ll see a list of the closest test centers to your zip code. These are NOT ordered by distance; they’re ordered alphabetically by location. Scan the list to find the most convenient test center, then make sure that the right column “Seats Available?” has a “select” button. If not, you’ll need to make another choice!
Page 19 – Final Review
Scan through this page to make sure that your information is correct. Some of this you can change later, but some of it you can’t.
Page 20 – Money Time!
You’ll see a total for all the options you selected on Page 10. Enter credit card information for your Discover, American Express, Visa, or Mastercard at the bottom of the page, and click “Submit.”
Congratulations! You registered for the ACT.
BUT WAIT………..
If this is your first time to register for the ACT, you’ll need to submit a photo to ACT. They’ll send you emails with instructions and reminders. Find out what happens if you forget…
As soon as you’ve submitted your photo, return to http://www.actstudent.org and print out your test ticket. Put it on your fridge as a reminder!

